Creating a weblogic domain with SOA Server -11.1.1.3.0
I was trying to install oracle soa server, but there was a lot of issues, I faced and then decide to write this blog. There is a lot of help available but the problem is its spread across a number of sites and documents. A developer with some basic knowledge and if want to learn Oracle Soa will be in the net of all these sites and documents to install a basic SOA server. So I am trying to point out the basic steps which need to configure a Oracle SOA server.
Prerequisite
There are number of pieces you need to download before starting the installation. my advice is first download all these files because these are quite large files and in the installation process you need all these files, which will make installation task 10-20 job once you have all these files.
Another prerequisite is oracle database. That is must for SOA installation, if you don't have oracle database installed you may need to install oracle database too. I would advice to go for oracle xe, a small light weight database suitable for the tutorials kind of environments. You can use complete oracle database too, steps will be same in both the cases.
1. Oracle database Link
2. Oracle fusion middleware Link
- WebLogic Server (10.3.3)
- SOA Suite (11.1.1.2.0)
- SOA Suite (11.1.1.3.0)
- Enterprise Repository (11.1.1.3.0)
3. Jdk (Its not required if you are not using 64 bit system)
In 32 bit systems you can use the jdk of your weblogic, which we install first and does not require any jdk to install.
4. System requirement :
Any good processor but RAM should be more then 3 GB.
Installation Steps
I am not adding the installation of oracle database, else its the first thing you must install in your machine, or if you are on a network you can use the oracle database installed in some other machine too, but you should know the system password for that database installation, which we need to run RCU on the database.
Note : In all the steps I am assuming database in the running condition, and details must be handy with you.
1. Installing RCU on the database.
RCU (repository creation utility) is required to create basic soa infrastructure on the selected database. Its quite simple and straight forward.
1.1 Unzip the file ofm_rcu_linux_11.1.1.3.0_disk1_1of1.zip
1.2 Double click on the file ofm_rcu_win_11.1.1.3.0_disk1_1of1\rcuHome\BIN\rcu.bat
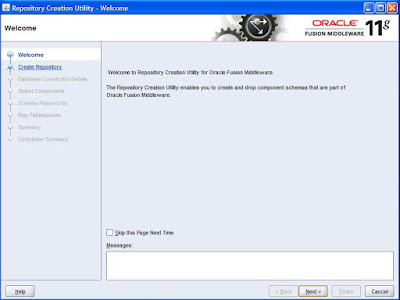
1.3 Now a installation window will come click next.

1.4 In the next screen, you need to choose create and click next.
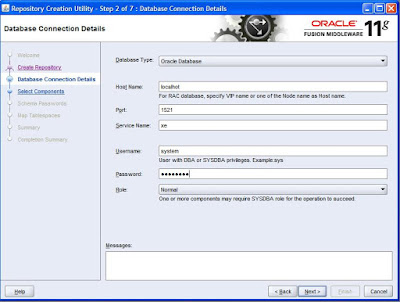
1.5 In this screen enter the detail of your database and click next.

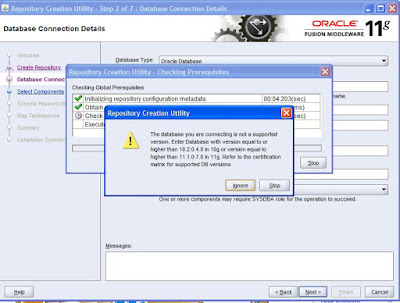
1.6 This screen will show a warning if you are using xe your database, ignore it and create next once its done with its processing.

1.8 Give a password to all the schema's which RCU is going to create for you, Note down this password, you will need this password in later steps and click next.
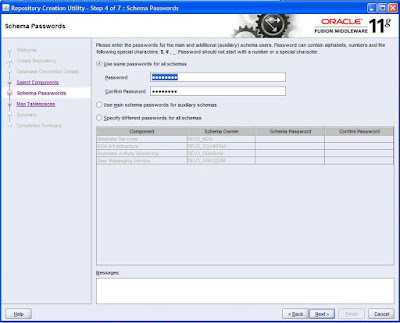

1.9 You will be prompted to create table space, select yes and then click next in all the screens in last screen click create. Its pretty straight forward.
2. Installation of weblogic
Once done with RCU we need to first need to install weblogic, on the top of which we will install SOA.
2.1) Double click on the wls1034_oepe111161_win32.exe downloaded from the oracle site, in case of the Linux operating system its a binary file execute it. A wizard will come
click next
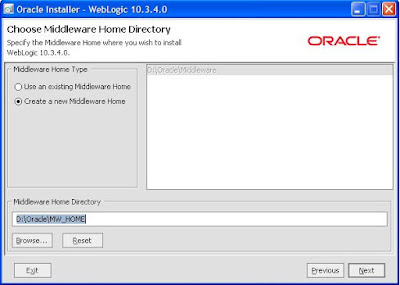
2.2) This screen want a choice from your side, we are in process of creating everything new
so choose "Create a new Middleware Home", for this installation I am using directory "D:\Oracle\MW_HOME" you can use any directory of your wish, this directory we
will use in all steps of installation.

2.3) If you have oracle support, enter your email id and support password, for education purpose we don't need it. Un-check the checkbox for receiving security update and click next.
2.4) Choose for typical install in this screen. and click next.
2.5) This screen will display all the location for the respective components, which weblogic
is going to install. Strictly no modification here, and click next.
2.6) Next screen choose the recommended option, you can also choose the second option,
options are self intuitive.
2.7) It is the last screen in installation and no modification from our side. Click next which will start installation of the weblogic.
It has complete the installation of the weblogic, next we will start with the installation of SOA server. Click Next for Soa Installation.


Comments